Panorama Imagery and Coordinate Systems
This section provides more background about Nearmap’s Panorama Tile Interface. There is complexity involved in how panorama tiles are arranged, and this section serves as background information to help understand the sample code that is provided below.
There is complexity involved in how panorama tiles are arranged, and this section serves as background information to help understand the sample code that is provided below. More sample code is available here.
Panorama Imagery
Nearmap Panorama imagery is an orthorectified mosaic of 45 degree imagery from each cardinal direction (North, South, East, West), intended for visualization use only. Because it is created by combining many images, metadata that is normally associated with oblique imagery (such as pose and calibration), is not available.
The intended use of the Tile API for Panorama imagery is integration of Panorama imagery in a third-party web application, also for visualization only.
Because it is created by combining many images, metadata that is normally associated with oblique imagery (such as pose and calibration), is not available. All the metadata available for panorama imagery is described under Coverage API.
NOTE: The Panorama imagery is only available to customers with a Nearmap Panorama or Nearmap Oblique product.
Integration of Panorama tiles into a mapping application is complex. You will need to have significant experience with coordinate system geometry and map projections, and experience developing non-trivial mapping applications with a mapping framework such as OpenLayers or Leaflet. Click here to view sample code for this. All the metadata available for panorama imagery is described here.
Foreshortening effect
Panorama tiles cover the same area as a vertical tile with the same coordinates. If visualized at the same size (256x256px), panorama tiles look distorted (stretched vertically). This is why we recommend that the client applications display panorama tiles at 256px (width) x 192px (height).
The compensation for the foreshortening effect needs to be done on the client. Theoretically, the best resize ratio for zoomed-in imagery is cos(45°), which yields images being 181 pixels high. Nearmap chose to use 192px in the MapBrowser application as it is convenient ratio.
Important tiling parameters
The following terms are useful for understanding panorama tiles:
| Term | Description |
|---|---|
| Tile Storage Width | The width of the image in pixels as it is stored. |
| Tile Storage Height | The height of the image in pixels. |
| Tile Display Width | The width of the tile as it should be displayed. |
| Tile Display Height | The height of the tile as it should be displayed in order to compensate for the foreshortening effect. |
| Tile Orientation | The direction in which the imagery in the tile is pointing. E.g. " East Up" means that the top edge of the tile is due East. |
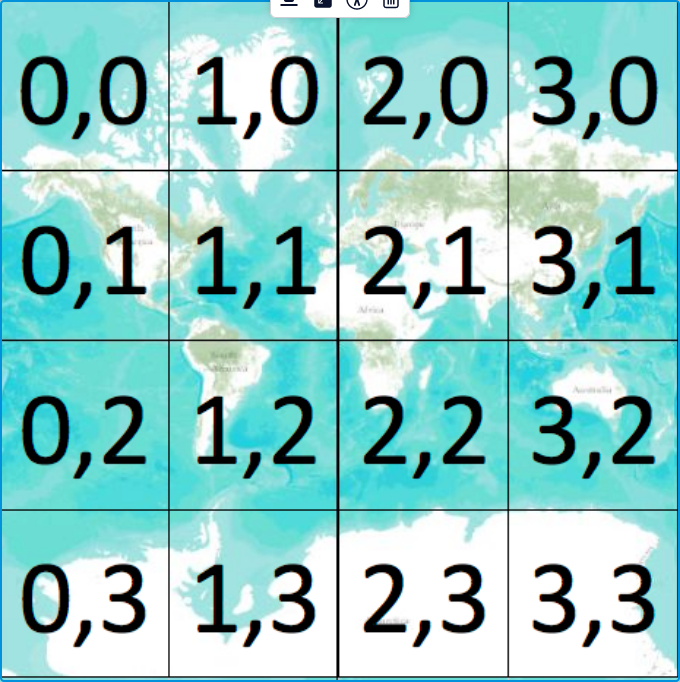
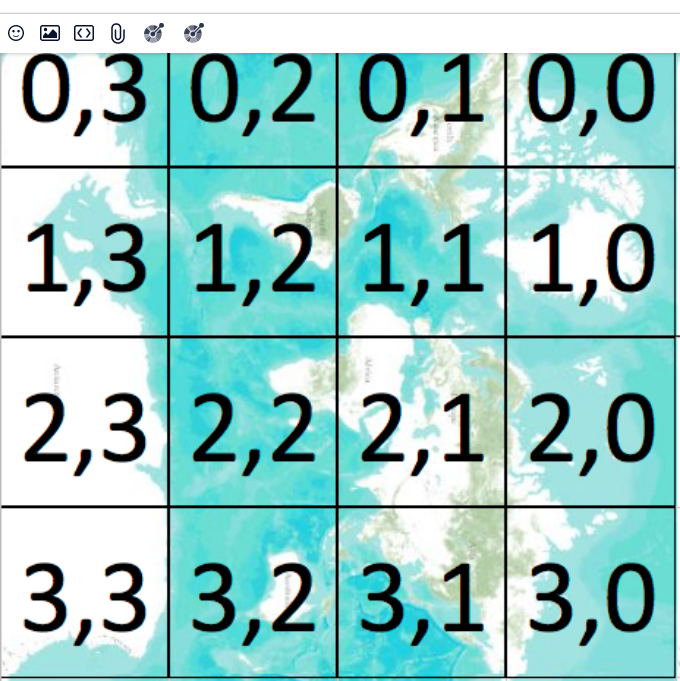
The images accompanying each orientation below demonstrate how tiling works using the "X,Y" format. To provide compatibility for the older web-mapping frameworks, the tiles are rotated for orientations other than Vertical and North. When representing them on Tile Storage Widththe screen, the client implementation should arrange the tiles according to the appropriate tiling scheme, as shown below.
Whilst the position X=0,Y=0 on the screen may move, the physical location of that tile is the same for all tiling schemes. The origin tile (X=0,Y=0) is always just west of Greenland, no matter the orientation.
Vertical
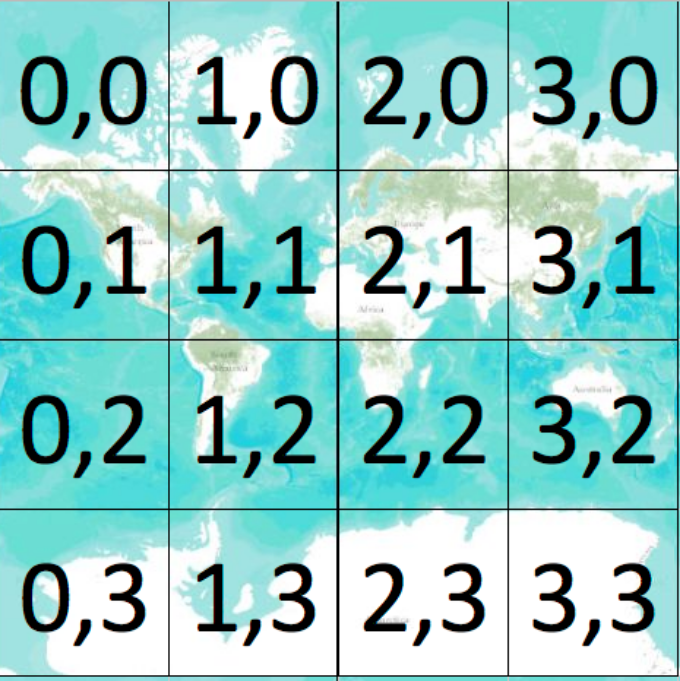
| Attribute | Value |
|---|---|
| Tile Storage Width | 256 px |
| Tile Storage Height | 256 px |
| Tile Display Width | 256 px |
| Tile Display Height | 256 px |
| Tile Orientation | North Up |
North
| Attribute | Value |
|---|---|
| Tile Storage Width | 256 px |
| Tile Storage Height | 256 px |
| Tile Display Width | 256 px |
| Tile Display Height | 192 px |
| Tile Orientation | North Up |
South
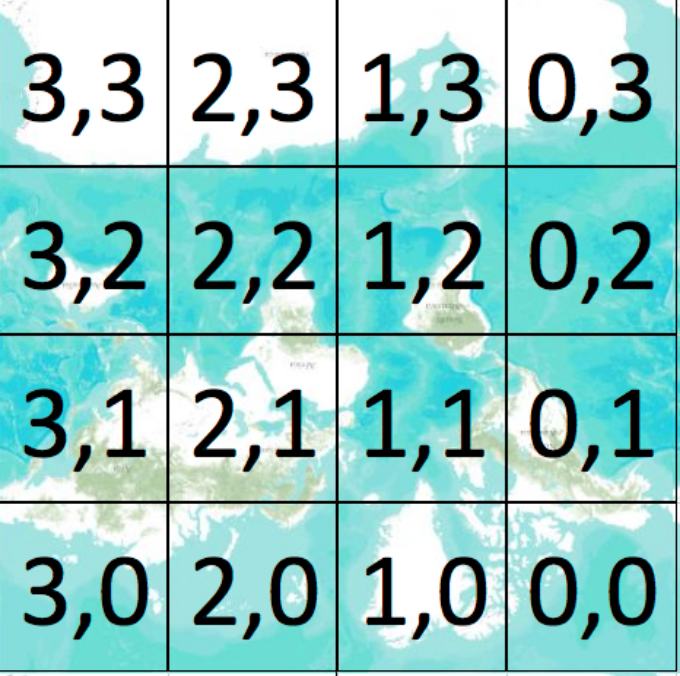
| Attribute | Value |
|---|---|
| Tile Storage Width | 256 px |
| Tile Storage Height | 256 px |
| Tile Display Width | 256 px |
| Tile Display Height | 192 px |
| Tile Orientation | South Up |
East
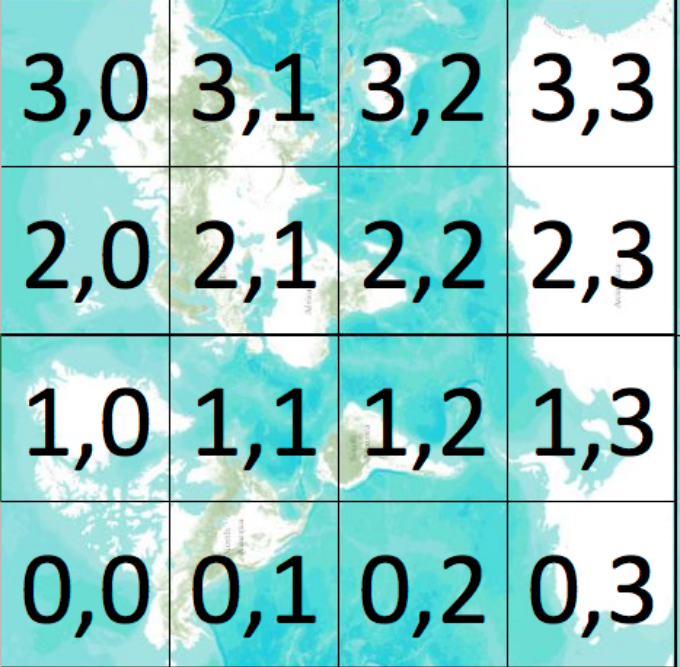
| Attribute | Value |
|---|---|
| Tile Storage Width | 256 px |
| Tile Storage Height | 256 px |
| Tile Display Width | 256 px |
| Tile Display Height | 192 px |
| Tile Orientation | East Up |
West

| Attribute | Value |
|---|---|
| Tile Storage Width | 256 px |
| Tile Storage Height | 256 px |
| Tile Display Width | 256 px |
| Tile Display Height | 192 px |
| Tile Orientation | West Up |
Updated over 1 year ago